
Best Product Management Courses Compared and Reviewed
April 12, 2024
The Complete Guide to Website Planning
April 12, 2024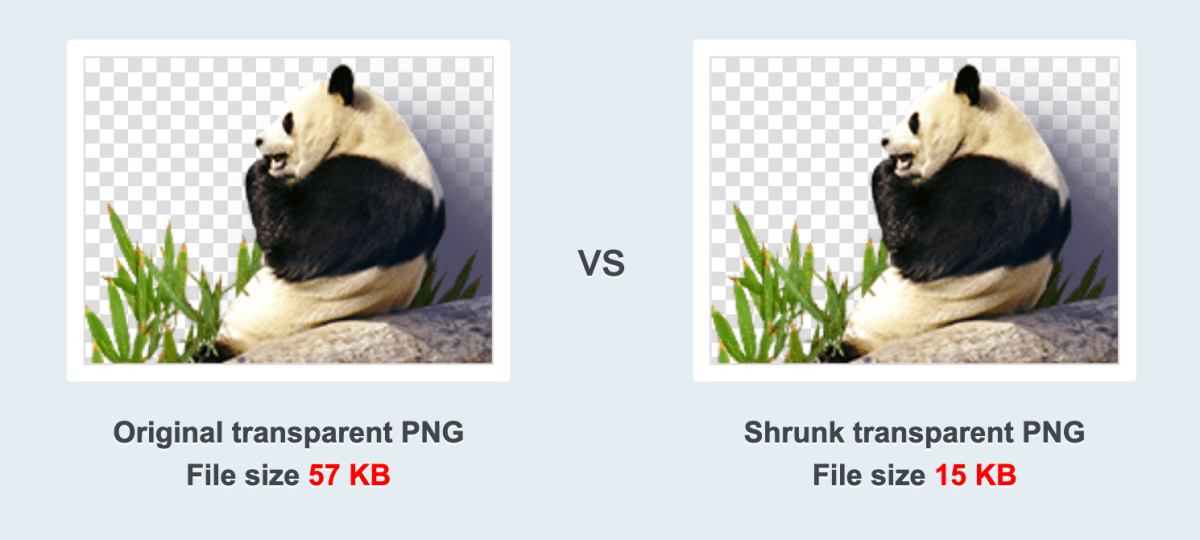
Disclosure: This content material is reader-supported, which implies when you click on on a few of our hyperlinks that we could earn a fee.
Picture optimization is the method of lowering the file measurement of a picture with out sacrificing its high quality. In case your web site is having efficiency points, together with gradual web page loading instances, picture optimization will help resolve your issues.
5 Steps to Optimize Web site Pictures
Right here’s an in-depth tutorial of the step-by-step course of required to optimize web site photographs. The method described under assumes that you just’re not utilizing a WordPress plugin for help.
#1 – Put together The Picture and Make Certain It’s Saved Correctly
Even when you’re utilizing a picture optimizer or compression instrument, there are some things you should do earlier than operating that picture via compression.
First, make any mandatory edits or enhancements to the picture. Issues like filters, cropping, distinction changes, publicity, saturation, and different edits must be dealt with earlier than you proceed. You’ll be able to proceed utilizing no matter picture enhancing software program you’re comfy with for this step.
From right here, it’s essential that you just save the picture correctly. For many web site photographs, you’ll have two essential choices to think about—PNG and JPEG.
- PNG Picture Recordsdata — PNG recordsdata are bigger, however they help a variety of colours. PNGs are additionally the one picture file format that works with clear backgrounds on an internet site. Should you’re enhancing a photograph a number of instances, it’s in your finest curiosity to export it as a PNG earlier than importing it to your web site.
- JPEG Picture Recordsdata — JPEGs present stability between high quality and file measurement. That is the most typical file format of digital cameras. JPEGs ought to work for the overwhelming majority of photographs in your website, particularly because the file format is smaller than a PNG.
General, PNGs work nicely for photographs that don’t have a ton of coloration. If a picture has a lot of traces, icons, or sharpness, PNG can be a greater possibility as nicely. JPEG compression may create some distinction points on this situation.
A high good thing about utilizing JPEG recordsdata is that you just’ll have the ability to select the standard of the picture earlier than operating it via a compression instrument.
Right here’s an instance utilizing Preview, the default picture viewer on a Mac:
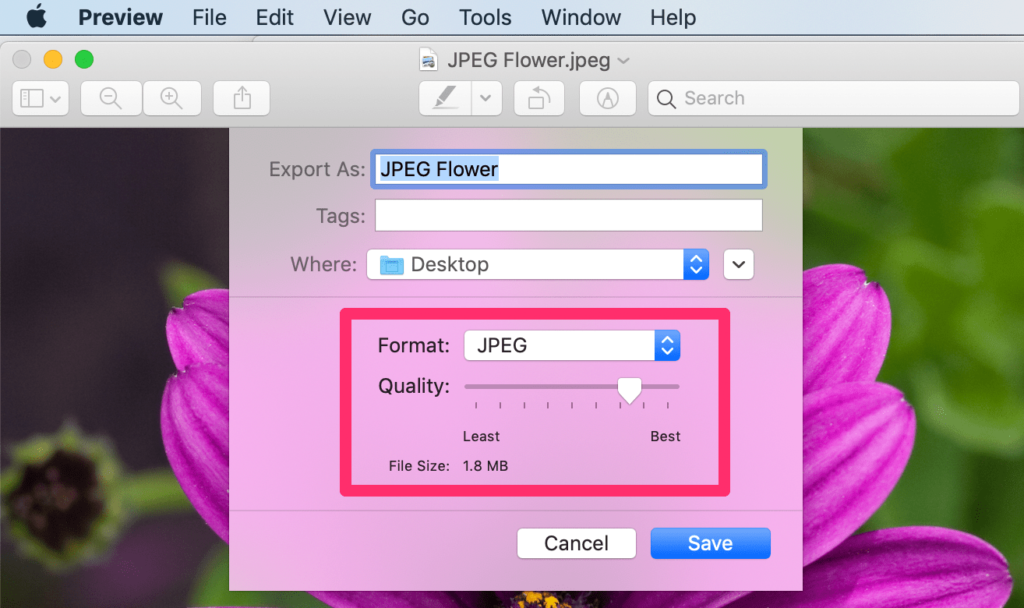
Should you export photographs as a JPEG file, you possibly can modify the standard by merely sliding the bar. By lowering the picture high quality, you’ll concurrently scale back the file measurement.
Except you’re an expert photographer, JPEG high quality round 40% to 50% must be nice for many of you. For instance, when you’re importing images to your portfolio of a consumer’s marriage ceremony, it’s most likely in your finest curiosity to sacrifice file measurement for picture high quality.
Along with the edits and selecting the best file format, you’ll additionally want to organize the proper picture dimensions earlier than continuing to the following step.
Take into consideration the place and the way the picture can be used in your web site. For instance, the size of a picture used inside a weblog publish will doubtless be completely different from a picture icon on a product web page.
If the content material space in your weblog is 700 pixels broad, the size for a picture right here ought to by no means be bigger than 700 pixels.
Any time you’re resizing a picture, be sure you allow the choice to scale the peak and width proportionately. In any other case, the picture will get distorted.
Right here’s an instance of a JPEG that was 2634 x 2718 pixels and 1.8 MB:
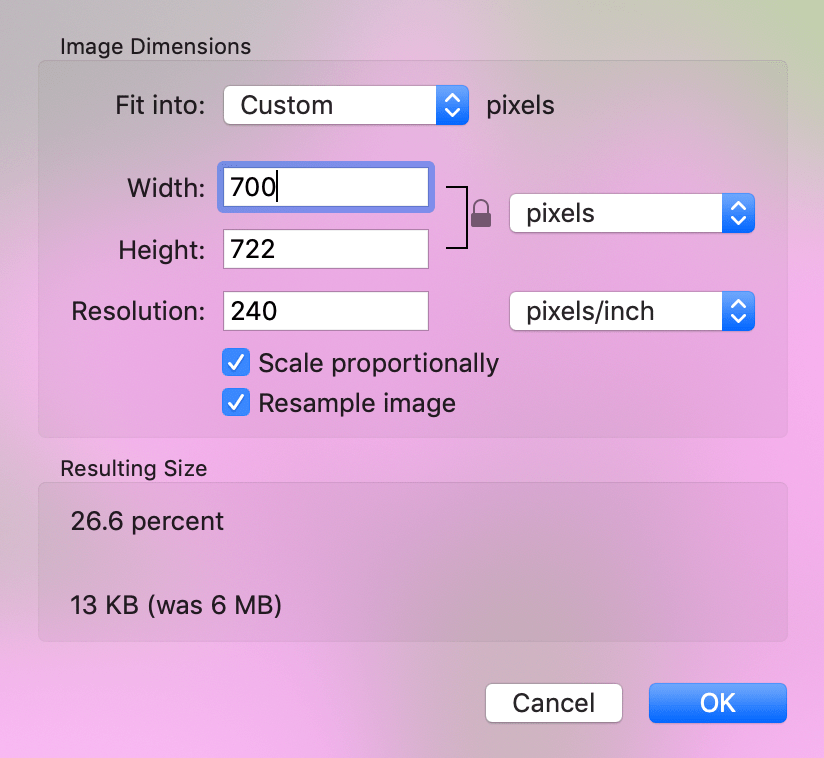
By altering the width to 700 pixels, the peak routinely scaled to 722 pixels. This additionally reduces the file measurement.
When you’ve saved the picture with the fitting file format and dimensions, you possibly can proceed to the following step.
#2 – Run the Picture Via a Compression Software
Now it’s time for the picture to get compressed. The best solution to compress photographs is by utilizing an internet instrument.
There are numerous choices to select from. However for our functions right here at the moment, we’re going to make use of TinyPNG.
1000’s of corporations worldwide depend on TinyPNG for picture compression. This consists of huge manufacturers like Samsung, Walmart, Sony, Lego, and Financial institution of America. As beforehand talked about, you need to use this TinyPNG totally free to optimize photographs on your web site.
Begin by navigating to the TinyPNG homepage. From right here, you possibly can merely drag and drop your picture file into the field on the high of the display screen.
The instrument will routinely compress any picture recordsdata that you just add with none further steps or actions required in your finish. As soon as the method is full, simply click on the obtain button to retrieve your newly compressed picture.
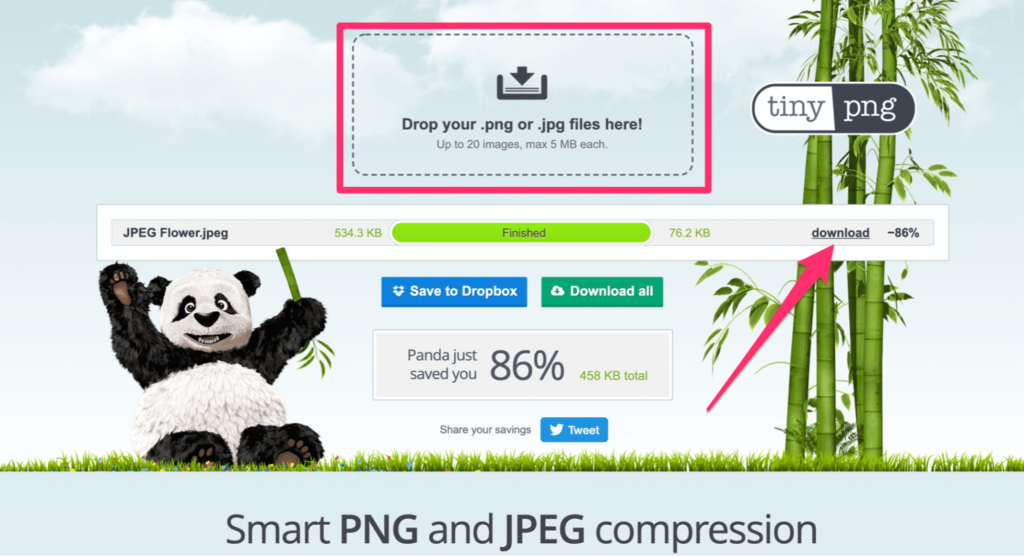
Within the instance above, TinyPNG took a JPEG file that was 534 KB and compressed it by 86%, lowering the file measurement to simply 76 KB.
The unique picture that we began with previous to the 1st step was a whopping 6 MB! It is a file that may be too giant to compress utilizing TinyPNG’s free service.
However after taking the time to reserve it as JPEG, modify the standard, and alter the size, it set us up for fulfillment with the compression.
Now, let’s fake we simply modified the standard of the preliminary JPEG with out adjusting the size. Should you refer again to the 1st step, you’ll see this decreased the file measurement to 1.8 MB (nonetheless considerably lower than 6 MB).
If we run that file via TinyPNG, it will get compressed to 446 KB—practically six instances bigger than our 76 KB file that we modified the size for.
That’s why the preparation in step one is so essential. Should you leap straight to the compression instrument, you’re nonetheless leaving lots on the desk by way of how a lot you possibly can optimize the picture.
The explanation why we advocate TinyPNG so extremely is as a result of the distinction in picture high quality is unnoticeable to the bare eye. Check out this instance evaluating two clear PNGs earlier than and after compression:

Do you discover any distinction? Didn’t assume so.
#3 – Add the Picture to Your Web site
This step will look a bit completely different for everybody. All of it is dependent upon the CMS that you just’re utilizing to energy your web site.
WordPress customers could have a unique interface than Magento, Shopify, Drupal, Joomla, BigCommerce, and many others. Since WordPress is the world’s hottest CMS, and that’s what we use to run our website right here at Top5webhost, we’ll use it as the instance for this step.
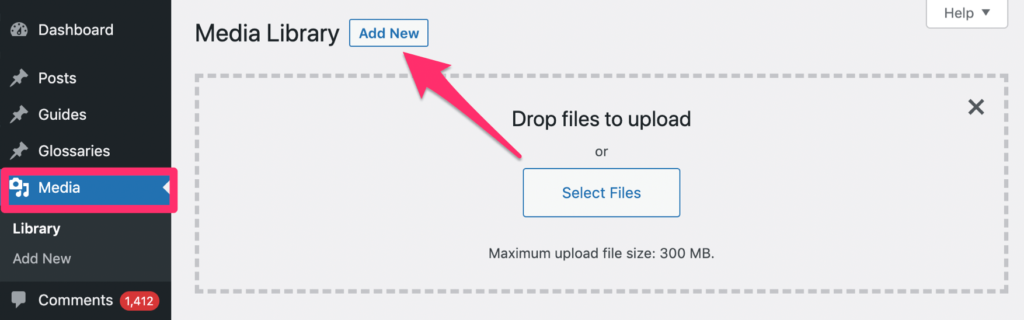
Navigate to Media on the left aspect of your WordPress dashboard. Then choose Add New and both drag-and-drop the picture or choose a file out of your pc.
As soon as a picture has been added to your WordPress media library, it’s simple to insert it into weblog posts or touchdown pages in your website. Alternatively, you possibly can full this course of in real-time as you’re creating new content material in your website.
For instance, let’s say you’re writing a brand new weblog publish on WordPress. Writing the textual content then coming again and inserting photographs later could not work nicely on your course of.
For the reason that picture optimization course of simply takes a minute or two, you possibly can undergo the primary two steps any time you attain some extent in your weblog publish that requires a picture.
Then simply click on the Add Media button on the publish and add the picture with out leaving the weblog.
Should you really feel like navigating away from the publish to handle the picture optimization distracts your writing workflow, that’s okay. Simply don’t neglect so as to add the photographs while you end writing.
#4 – Host Your Pictures on a CDN
Bear in mind why we’re optimizing photographs within the first place—we’re making an attempt to enhance web page loading pace.
Along with the picture optimization itself, you possibly can take this idea one step additional by internet hosting your optimized web site photographs on a CDN (content material supply community).
Moderately than storing the photographs by yourself servers, CDNs have networks strategically positioned all around the world. So web site guests will get photographs delivered to their display screen from a server that’s closest to them, geographically talking.
For instance, let’s say your web site servers are positioned in the US. If a consumer in Europe lands in your website, the CDN can use a server that’s positioned nearer to that particular customer, in the end growing the web page loading pace.
Tinify CDN is TinyPNG’s content material supply community. So when you’re utilizing TinyPNG to optimize your photographs, it’s solely pure to think about them as your CDN supplier as nicely.

Whereas a CDN doesn’t exchange your website hosting service, it could possibly take a big load off of your servers.
Tinify CDN begins at $15 monthly. However that plan actually solely accommodates private web sites and small blogs.
Most of you ought to be signing up for the Enterprise package deal, at a minimal. This plan begins at $69 monthly, and you’ll attempt it free for 14 days.
#5 – Use a Lazy Load Plugin (BONUS)
By now, you’ve already optimized the photographs on your web site. And whereas there’s nothing you are able to do to optimize the picture any additional, there are nonetheless steps you possibly can take to make sure your pages load as quick as attainable.
Lazy loading plugins are your only option right here.
The idea behind lazy loading is easy. Pictures that aren’t within the subject of view aren’t loaded till a customer will get nearer to that a part of the web page.
So photographs on the backside of your web page gained’t load concurrently a picture above the fold. This tip will considerably improve your web page loading pace, particularly for pages with a number of photographs.
Examples of widespread lazy load plugins embody:
For these of you who need to take your web site picture optimization technique to the following stage, these plugins will get the job performed.
Subsequent Steps
Now that you just’ve mastered picture optimization on your web site, it’s time to deal with different methods to enhance your web site efficiency.
Take a look at our information on one of the best methods to hurry up your web site and enhance conversions. The following pointers transcend primary picture optimization.
You also needs to discover ways to clear your cache in WordPress. This five-step information is extraordinarily useful for WordPress newbies on the lookout for methods to enhance their website efficiency. It’s particularly helpful for web sites with a lot of photographs.
