
The Beginner’s Guide to Website Design Best Practices
March 25, 2024
7 Easy Steps to Install Google Analytics in WordPress
March 25, 2024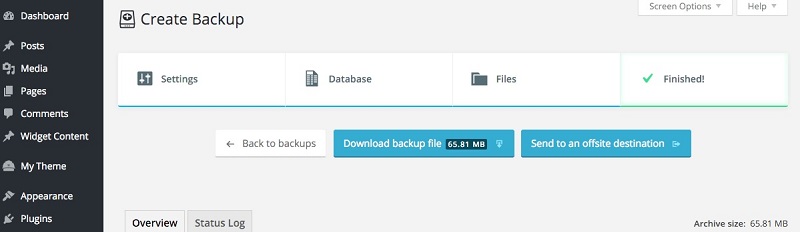
WordPress software program is the go-to for individuals trying to create content material for the net.
Simply because it’s standard doesn’t imply it’s the right answer as-is for each content material creator, although. Happily, you possibly can tailor the software program to raised meet your wants.
Creating customized WordPress widgets requires realizing some coding methods. Nonetheless, creating these widgets will ship the personalization you could have to make WordPress work higher for you.
Why Making a Customized WordPress Widget is Value It
A WordPress widget is a bit of code that offers customers the power so as to add parts to a WordPress web page with drag and drop ease. The widget simplifies including parts like:
- Banners
- Signal-up kinds
- Menus
- Calendars
- Search bar
- Lists
Widgets simplify constructing your WordPress web site with design parts, inserting attention-grabbing visible parts and helpful info to your readers in clearly seen areas.
If constructing your personal widgets looks like an excessive amount of work, perceive that WordPress contains many present widgets as a part of the software program. Third-party builders additionally commonly create widgets that you simply typically can use totally free.
Nonetheless, if not one of the present widget choices fairly do what you want them to do, the method of making your personal WordPress widgets is price exploring.
The Funding Wanted to Create Customized WordPress Widgets
Making a custom-made WordPress widget goes to require a little bit of a time funding in your half. If you’re not accustomed to what PHP coding appears to be like like, or in case you dislike having to kind exact strings of textual content with no errors, the method could also be a protracted, irritating slog with no assure of success.
The WordPress assist web site provides a reference web page designed that will help you create the entire coding accurately, itemizing the varied choices you could have obtainable. This doesn’t essentially make the method simple for a newbie, nevertheless it ought to assist you keep away from some vital coding errors that depart your widget unable to operate because it ought to.
The excellent news is you don’t want a pc science diploma to create your personal customized widgets for WordPress. Newcomers can do the work efficiently, so long as they’re prepared to do some homework about PHP coding first. Perceive that you simply in all probability might want to spend a couple of to a number of hours familiarizing your self with not less than essentially the most fundamental coding methods earlier than beginning your personal widget.
The even higher information is that there’s not an enormous monetary funding required to create a customized widget. Past the funding you’d make anyway in creating your WordPress web site, signing up for webhosting, and so forth, there’s no extra value to create customized widgets your self.
Constructing Your First Customized Widget
After studying a bit about PHP coding, you’ll be able to strive making a customized widget. The primary time you construct a customized widget for WordPress, it might take you a few hours for an especially fundamental widget. When you don’t kind precisely, it might take one other hour or so to trace down and repair typographical errors and coding errors.
Some individuals could favor utilizing the premade widgets which are a part of WordPress to avoid wasting time and problem. (Scroll forward to be taught extra about these.) Nonetheless, in case you want a widget that’s exactly tuned to the way in which you utilize WordPress, you might have no alternative however to create a customized widget.
11 Steps to Create a Customized WordPress Widget
Listed here are the steps required to create your personal customized widget. Perceive that we’re itemizing essentially the most fundamental steps right here. For extra exact wants, you’ll have to seek the advice of the WordPress assist web site and examine PHP coding methods.

#1 – Take a Few Preliminary Steps
Earlier than beginning the method, we advocate that you simply take a few steps to guard your WordPress web site. Throughout this course of, the possibilities of making an enormous error that damages your web site are small, however they do exist.
- Again up the positioning: Create a full backup of your WordPress web site earlier than you start the method of making a customized WordPress widget.
- Use a toddler theme: Don’t use your foremost WordPress theme to create your first customized widget. Work on a toddler theme till you’re absolutely snug with the method to forestall potential errors.
- Discover a check setting: It would be best to discover a solution to check your newly created widget on a neighborhood setting, somewhat than on a reside web site.

#2 – Choose a Textual content Editor
You’ll be creating the coding that the widget requires inside a textual content editor. You do not need to make use of Microsoft Phrase or Google Doc to create your coding textual content for the WordPress widget, as these phrase processing software program packages generally place invisible characters into the file. Hidden characters may trigger the coding to work improperly.
Textual content editors don’t present a lot in the way in which of choices for formatting the textual content, however since you’re simply looking for a fundamental, clear textual content string, you don’t need formatting (which can also add hidden characters).
Some protected textual content editors you would use totally free embody:
- Atom
- Notepad (included with Home windows)
- Notepad++
- TextEdit (included with the Mac OS)
#3 – Perceive the 4 Primary Strategies of Widget Creation
Throughout the newest model of WordPress, the software program helps as much as 18 strategies that you need to use to create a customized widget. You’ll add particular person strategies to the file you create within the textual content editor to inform WordPress find out how to deploy the widget.
WordPress makes use of its built-in WP_Widget class to deploy these strategies. WP_Widget is the portion of WordPress that runs widgets.
To create essentially the most fundamental customized widget in WordPress, you need to make use of not less than 4 strategies. You may use 4 strategies for making a fundamental banner that greets guests to the positioning, for instance. Essentially the most generally used 4 fundamental strategies are:
- __construct()
- widget()
- kind()
- replace()
For our dialogue of the steps required to create a customized widget for WordPress, we’ll persist with these 4 fundamental strategies. Nonetheless, if you wish to create a customized widget that provides extra advanced performance, you will want to make use of extra strategies.

#4 – Create the Header
Open the textual content editor you’re going to make use of. Within the opening part of the editor, you’ll add the textual content:
class [name of your widget] extends WP_widget {
Contained in the sq. brackets, you’ll have to enter the identify of your widget, utilizing an underscore between every phrase. You’ll then want so as to add every of the strategies you wish to use so as. Add a closed bracket on the finish of the complete file to offset the open bracket proven right here.
You have got fairly a couple of choices for creating the coding inside your textual content editor to make the customized WordPress widget. We won’t attempt to record each risk that you may enter into the file to your widget, which might turn out to be unwieldy. As a substitute, we’ll record essentially the most fundamental textual content you’ll add.

#5 – Add the __construct() Technique
Utilizing the __construct() technique in your textual content editor lets you arrange the parameters to your customized WordPress widget. This technique spells out the widget ID, the title (or identify), and the outline. Introduce the __construct() technique like this:
public operate __construct() {
Word the double underscore that’s a part of this command, in addition to the open and closed parentheses. (You have got the choice of including additional instructions between the parentheses for every technique.) It’s vital to enter all of those characters correctly. Making an error in including the textual content could cause vital issues to your coding.
Individuals who commonly do coding perceive the necessity for getting into precise characters. Those that are new to coding and constructing a widget like this may increasingly turn out to be extraordinarily annoyed making an attempt to enter the entire characters correctly.
On the traces following the introduction of the __construct() technique, you then can add the ID to your widget, which wants to precisely match the identify you used within the header. You possibly can add notes in addition to descriptions of what every line does.
With the ID command, you’ll add a reputation on this part that signifies how WordPress will show the identify of the widget throughout the software program.
After getting into the entire info that’s a part of the __construct() part, add the closed bracket.
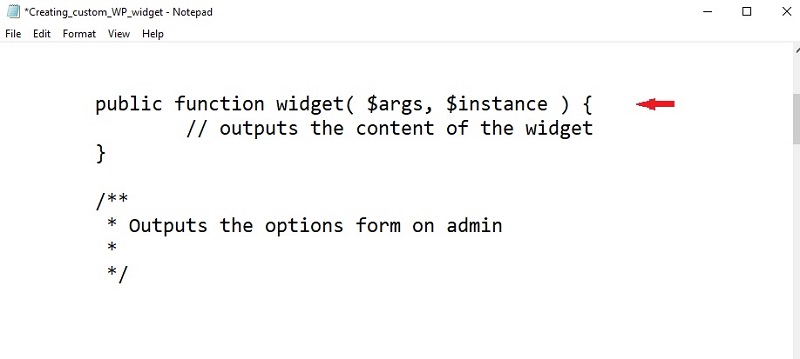
#6 – Add the widget() Technique
Use the widget() technique part so as to add and outline the output that the widget will generate. The widget() technique shows the HTML code within the widget on the entrance finish of your WordPress web site.
You possibly can enter the message that the widget will show in your web site by way of this part, for instance. You can also specify the title for the widget on this part, in addition to including a “be taught extra” hyperlink contained in the widget.
You possibly can even add clean traces for the customized widget by way of the widget() technique. Adjusting the positioning of the clean traces will drastically have an effect on the way in which your widget appears to be like. You possibly can add description traces inside this part, must you wish to add notes to elucidate a few of the traces of code.
Introduce the widget() technique like this:
public operate widget() {
After getting into the entire instructions and notes inside this technique, don’t overlook so as to add the closed bracket, otherwise you’ll generate coding errors.

#7 – Add the shape() Technique
Subsequent, you’ll be including the shape() technique to your textual content editor. Inside this part, you’ll be establishing kind fields that create the choices for the backend of the widget. It controls how the widget will look on the backend.
Introduce the shape() technique like this:
public operate kind() {
Don’t overlook so as to add the closing bracket after getting into the data within the kind() technique. For a quite simple widget, you could solely add a bit of bit of knowledge right here.
#8 – Add the replace() Technique
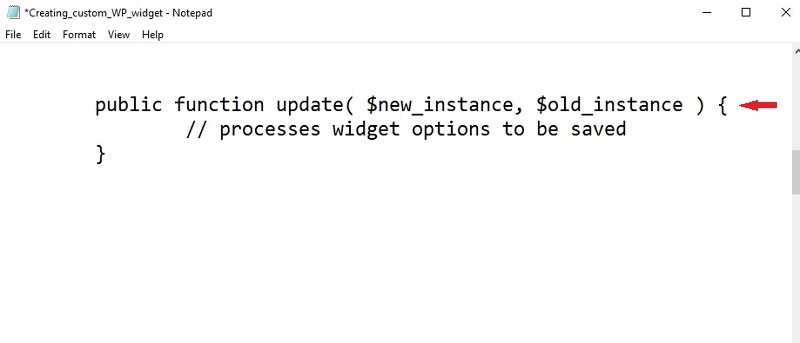
The fourth technique for making a fundamental custom-made widget in WordPress includes including the replace() technique.
This technique makes it simpler to customise the widget after it seems on the positioning, permitting you to alter a banner message, for instance. Slightly than having to return and construct a completely new widget every time you wish to change the textual content within the widget, the replace() technique makes it far simpler to alter the textual content.
Gadgets that you may add by way of the replace() technique embody:
- A area for the widget title
- An space for a textual content message
- A area for a URL tackle that guests can click on
- A choose area to find out whether or not clicking the URL will open a brand new browser tab
Introduce the replace() technique like this:
public operate replace() {
Add the closed bracket after you end including the data. If you’re making a easy widget, you could not have a whole lot of info so as to add to the replace() technique.

#9 – Registering the Customized Widget
As a ultimate step for getting into textual content into the textual content editor to your widget code, you’ll want to incorporate a operate that registers your widget with WordPress and tells it find out how to use the customized widget. Begin with:
operate [name of your widget] () {
You’ll want so as to add the closed bracket after including any additional directions you could have.
Then make use of the add_action code, which completes the method of telling WordPress to load the widget and start utilizing it.
The add_action code ought to embody:
add-action ()
Use a semicolon after the closed parenthesis within the add_action code.
Add the coding required to register the widget to the tip of the textual content editor file. With some older variations of WordPress, although, you could want so as to add the textual content for registering the widget on the prime of the file, forward of the entire different textual content.
#10 – Including Your Code
When you’ve accomplished creating your code within the textual content editor, you can be able to check it out. You’ll need so as to add it to the capabilities.php file.
You’ll need to log in to your WordPress administration space so as to add the code. The capabilities.php file is on the market by clicking on Look, Theme Editor, and Theme Features. Throughout the capabilities.php file, paste the textual content out of your textual content editor on the backside of the file and click on Replace File to avoid wasting your adjustments.
#11 – Utilizing the Customized Widget
Throughout the WordPress window, click on on the Look menu, adopted by Widgets. It’s best to see the identify of your widget listed.
Click on on and drag the identify of the widget into the Sidebar part (listed towards the fitting of the web page) to choose the place of the widget on the web page. Click on Save.
Then go to your WordPress web site to see if the widget seems. If it appears to be working, you created the widget accurately. If it isn’t working accurately, you will want to return to the textual content editor and seek for coding errors.

Including and Customizing a Premade Widget
If the coding work so as to add a widget appears overwhelming, WordPress has some widgets constructed into the software program. Moreover, some WordPress themes will present entry to widgets that you need to use with out having to do coding. Some plugins add widgets as properly.
To see the widgets which are a part of WordPress already, open the admin web page. Click on on Look, adopted by Widgets.
Within the Widgets window, you’ll see a listing of obtainable widgets that you may add to the web page. Alongside the fitting facet of the window, you’ll see the areas of your web page the place you possibly can add widgets (together with the Sidebar space). The areas you could have obtainable will rely upon the WordPress theme you’re utilizing.
So as to add one of many premade widgets to your web page, click on on it, dragging it to the fitting facet of the window. Drop it onto the part the place you’d prefer to see it seem.
Eradicating Widgets
To take away a widget out of your web page, open the Widgets window once more. Look by way of the record of widgets already on the web page alongside the fitting facet of the window. Click on on the identify of the widget you wish to take away. Then click on Delete.
Subsequent Steps
Actually, utilizing correct PHP coding to create a customized WordPress widget generally is a vital problem for somebody who’s new to coding. Nonetheless, upon getting the method found out, this tradition widget can provide your web site a bonus over rivals.
Creating your personal WordPress widgets ought to simplify the method of creating content material that appears nice. Including customized info could even assist you increase the attain of your web site.
Discovering a WordPress internet hosting service that gives the options you want for the brand new route of your web site generally is a good subsequent step to take. Contemplate investigating the perfect ecommerce themes in WordPress too, as these might help you monetize your rising web site.


